Difference between revisions of "Gladiator Armor Quest"
| Line 24: | Line 24: | ||
[[file:Gladiator Armor Quest Map 6.png|200px]] [[file:Gladiator Armor Quest Map 7.png|200px]] [[file:Gladiator Armor Quest Map 8.png|200px]] go north-west and follow the way to break the third cauldron [[File:Cauldron.gif]] | [[file:Gladiator Armor Quest Map 6.png|200px]] [[file:Gladiator Armor Quest Map 7.png|200px]] [[file:Gladiator Armor Quest Map 8.png|200px]] go north-west and follow the way to break the third cauldron [[File:Cauldron.gif]] | ||
<hr> | <hr> | ||
| − | [[file:Gladiator Armor Quest Map | + | [[file:Gladiator Armor Quest Map 9.png|200px]] Go back one floor and follow the way to break the fourth cauldron [[File:Cauldron.gif]] |
<hr> | <hr> | ||
| − | [[file:Gladiator Armor Quest Map | + | [[file:Gladiator Armor Quest Map 10.png|200px]] Follow the way to break the fifth cauldron [[File:Cauldron.gif]] |
<hr> | <hr> | ||
| − | [[file:Gladiator Armor Quest Map | + | [[file:Gladiator Armor Quest Map 11.png|200px]] [[file:Gladiator Armor Quest Map 12.png|200px]] Follow the way to break the sixth cauldron [[File:Cauldron.gif]] |
<hr> | <hr> | ||
| − | [[file:Gladiator Armor Quest Map | + | [[file:Gladiator Armor Quest Map 13.png|200px]] [[file:Gladiator Armor Quest Map 14.png|200px]] Follow the way to break the seventh cauldron [[File:Cauldron.gif]] |
<hr> | <hr> | ||
| − | [[file:Gladiator Armor Quest Map | + | [[file:Gladiator Armor Quest Map Fdp.png|200px]] [[file:Gladiator Armor Quest Map 16.png|200px]] Follow the way to break the eighth and last cauldron [[File:Cauldron.gif]] |
<hr> | <hr> | ||
| − | [[file:Gladiator Armor Quest Map | + | [[file:Gladiator Armor Quest Map 17.png|200px]] Return to the marked place and pull the lever [[File:Lever.gif]] to spawn the teleport [[File:Magic Forcefield (Azul).gif]] |
<hr> | <hr> | ||
[[file:Levitate Spell.gif|200px]] To go up the highest floor, you will need to use <u><i>exani hur "up</i></u> | [[file:Levitate Spell.gif|200px]] To go up the highest floor, you will need to use <u><i>exani hur "up</i></u> | ||
Revision as of 23:35, 29 December 2024
Requirements
- Crowbar
- If you lose it, you can buy a new one on the Tool NPC.
Rewards
- Gladiator Armor
- Gladiator Shield
- Tier 1 Quest Box
Walkthrough
Enter on Gladiator Armor Quest teleport
 Once you go down the stairs, click on the dead corpse
 ![]() and get a crowbar
and get a crowbar ![]() .
.
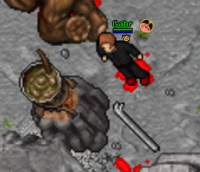 Use it to break 8 cauldrons
  around the map.

 Follow the way and use the crowbar
 ![]() to break the first cauldron
to break the first cauldron 

 Go back to the entrance and follow the way to break the second cauldron
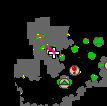
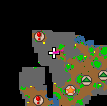
 go north-west and follow the way to break the third cauldron
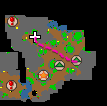 Go back one floor and follow the way to break the fourth cauldron
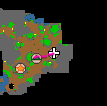 Follow the way to break the fifth cauldron
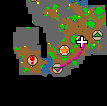
 Follow the way to break the sixth cauldron

 Follow the way to break the seventh cauldron

 Follow the way to break the eighth and last cauldron
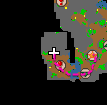 Return to the marked place and pull the lever
 ![]() to spawn the teleport
to spawn the teleport ![]()
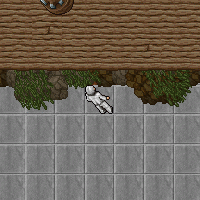 To go up the highest floor, you will need to use exani hur "up
Fight against Stonecracker boss  and enjoy your rewards.
